Showing posts with label Cloth Diapering. Show all posts

Thursday, May 23, 2013

...I'm using fruit as laundry detergent for my cloth diapers!!

Ok, not exactly. It's an organic alternative called SoapNuts. It's literally the dried hull of a berry!

From their website: "...SoapNuts are a berry that grows in the Himalayas that naturally produces a soap. The soap is called saponin, a natural cleaner that works as a surfactant, breaking the surface tension of the water to penetrate the fibers of your clothing, lifting stains from the fabric and leaving dirt suspended in the water that is rinsed away."

 I'd heard a lot about them, even saw them on Shark Tank once, and general consensus is that they are gentle enough to be used for face wash, yet effective enough for laundry detergent....I'm focusing on its use as a detergent here. I also have another tutorial on DIY detergent (here) but that version isn't cloth diaper safe. I love the way it makes everything smell and feel, and it's my beloved inexpensive go-to detergent for all our other clothes, but I needed to find something money-smart to use on the cloth diapers...so, here it is!

I lucked out and had a friend who invited me to a co-op so we got an incredibly low price for a large lot of SoapNuts, but they can also be purchased from the company (here) in different quantities (anywhere from samplers, to 10 loads worth for $4.50, to 360 loads worth for $29.95...still cheaper than store bought at 90 loads for $20!!)

For no reason other than I just like liquid detergents, I searched the internet for a way to make liquid detergent out of them (the company sells the liquid, but I got the deal on the nuts themselves, so I'll just have to make it.) As with most organic and DIY products, I found a lot of different ways to make it. It was trial and error, but this being my first trial I'm pretty happy with how it turned out! Here's how I did it:
 :-•:*"*:•.-:¦:-•*"!*•-:¦:-•:*'''*:•-:¦:-•:*"*:•.-:¦:-•*"!*•-:¦:-•:*'''*:•-:

 
Step 1: Gathering the supplies!

                                                    - 4 cups of water (then 3 more later)
                                                    - 15 soap nuts
                                                    - A medium sized pot
                                                    - A clean container to store your detergent
                                                      (I used my empty Charlie's Soap liquid bottle
                                                    because it  has that nifty 1oz measuring cup on top!)


:-•:*"*:•.-:¦:-•*"!*•-:¦:-•:*'''*:•-:¦:-•:*"*:•.-:¦:-•*"!*•-:¦:-•:*'''*:•-:

Step 2: Put 4 cups of water in the pot, and let your assistant add in the nuts.


:-•:*"*:•.-:¦:-•*"!*•-:¦:-•:*'''*:•-:¦:-•:*"*:•.-:¦:-•*"!*•-:¦:-•:*'''*:•-:

Step 3: Boil the nuts!

Set the stove to medium-high: they will boil over like noodles so adjust the heat if needed, you only want a nice rolling boil. I used a meat tenderizer to smush them a little during cooking. In the laundry they're bumped around to release the soap, so I chose to immitate (overboard) that during this stage.

I also checked the color of the nuts periodically. When all the soap is out of them they are a dull gray-brown color, so I was checking that their rich chocolate color was gone (that's truthfuly how I judged how long to boil them for!). About every 20 minutes I added 1 cup of water to replace what was evaporating, and did this over a 1 hour period.


:-•:*"*:•.-:¦:-•*"!*•-:¦:-•:*'''*:•-:¦:-•:*"*:•.-:¦:-•*"!*•-:¦:-•:*'''*:•-:
 
Step 4: Let it cool, filter, and bottle it!

You don't have to wait too long to filter and bottle it, just long enough to be able to handle it and not have it melt your container ;)

I use my cloth diaper wipes (cut up t-shirts) as filters with all my homemade products, but cheesecloth will work too.
 
 
 :-•:*"*:•.-:¦:-•*"!*•-:¦:-•:*'''*:•-:¦:-•:*"*:•.-:¦:-•*"!*•-:¦:-•:*'''*:•-:
 
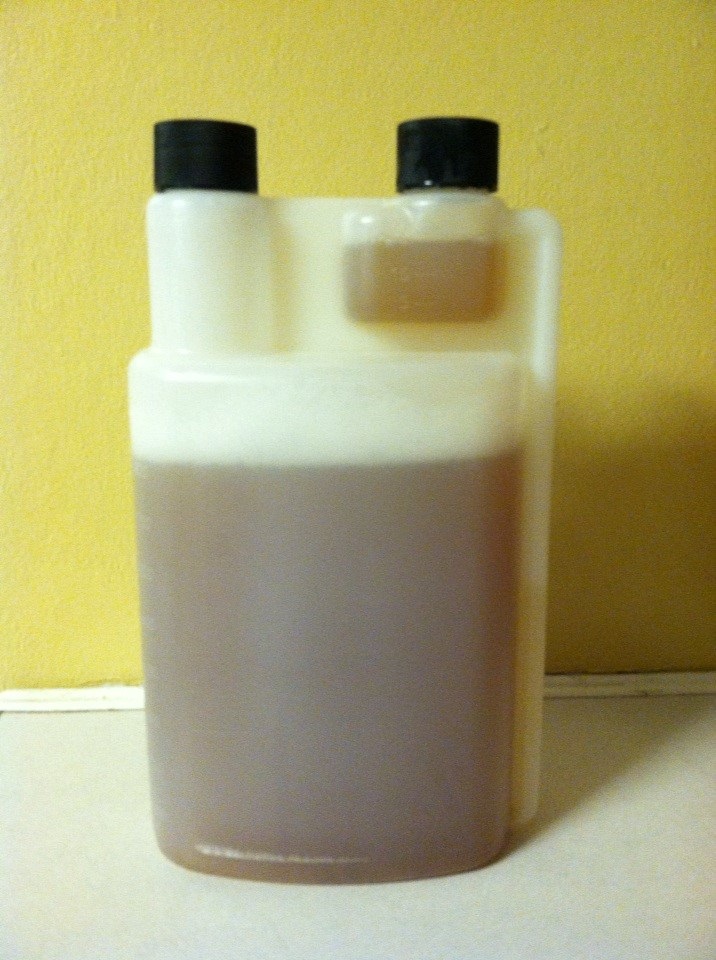
And here is the finished product! This is good stored in the laundry room cabinet for 3 weeks, longer if you store it refrigerated. (I'm using 2oz per load, seems to be just right.) The detergent itself has a soft nutty smell, but the laundry doesn't pick that up...it's just clean.
 
 
:-•:*"*:•.-:¦:-•*"!*•-:¦:-•:*'''*:•-:¦:-•:*"*:•.-:¦:-•*"!*•-:¦:-•:*'''*:•-:
 
**SPECIAL NOTE**
 
When I strained the detergent I had a handful of almost-gray hulls, but in stead of tossing them I'm going to keep them frozen until I make this again. There's no harm in using them again, it can only draw more soap from them, and I'd hate to waste any bit of soap these things have in them.


Friday, April 19, 2013

..I made my own Citrus Enzyme Cleaner!!

Because we use cloth diapers, we've learned that there are certain products that we can and cannot clean them with...we've also learned that sometimes the more natural a product is, the fewer ingredients they have, the more safe and effective they are at cleaning our diapers without harming them. Namely, a product called BacOut (by Biokleen). It uses naturally occurring citrus enzymes to break away and disinfect the grime and buildup in diapers, plus it actually helps to clean your washer as it runs through the system.

BacOut is a little pricey, though. So, I started doing some poking around online and found a way to make my own (here). The great thing about this recipe is that it not only works in your laundry, but it can be added to basically every household cleaner you make to boost cleaning power.

There are two ways of doing this: one involves adding yeast which speeds the fermentation process to only two weeks, the second is to leave out the yeast to let fermentation happen naturally which will take 3 months. If you choose to leave out the yeast, just skip that step ;)

Citrus Enzyme Cleaner Recipe:

Ingredients:
-2 cups citrus scraps (orange, lemon, or lime peels and pulp)
-1 liter (4 1/4 cups) water - distilled is best
-1/2 cup brown sugar
-1tsp yeast (optional, to speed up proces from 3 months to 2 weeks)
-2 liter bottle (or any large glass or plastic container, I used a container from my husband's protein shake mix and an xl pickle jar)
*because my container was so large I doubled this recipe

Instructions:
-Pour brown sugar into the 2 liter bottle
-Chop or slice citrus scraps to 1/2 inch pieces, then add into bottle
-Add water and yeast
-Screw on lid and shake to dissolve sugar
-Mark with "Ready" date

Shake and release gas daily. This recipe relies on fermentation so there WILL BE GAS BUILDUP. You have two options: Leave the lid slightly unscrewed, or release the gasses daily. I chose to just unscrew the lid once a day when I shook it.

When your cleaner is ready you'll have to filter it before bottling it to remove all solids. I used one of our cloth diaper wipes (cut from old t-shirts) for a filter, but you can also purchase cheese cloth at a fabric store to do the job.

I filtered the cleaner first into a large pitcher, seen here with my second batch in a glass pickle jar (still 'cooking')

A square of old t-shirt works perfectly for filtering!

After filtering once into my pitcher, I used the same process to filter it again into my empty BacOut bottle. I store the BacOut bottle in the laundry room for easy access there, and also had enough to fill a large spray bottle for everyday cleaning.

Bonus: If you spill some on the counter like I did, it's okay! This stuff is a CLEANER so just use your 'mess' to wipe of your countertops :D

So far I've used this on natural and finished wood, bathroom surfaces (including toilet), kitchen sink and counters, in my homemade glass cleaner, and on linoleum flooring and it passes every test!

The original site OneGoodThingByJillee also notes the ratios to add your Citrus Enzyme Cleaner to your other household products, and lists a few additional uses:

1) for dishes and laundry (use 1/4 cup of enzyme)
2) for washing bathrooms and toilets. grime comes off easily (1 part enzyme to 10 parts water)
3) for removing stubborn stains and odours (coloured fabrics and floors) (use undiluted)
4) to clean vegetables and fruits (1 part enzyme to 10 parts water)
5) clear blockages in kitchen sinks and drains (use concentrated or blended pulp/sludge of enzyme)
6) as a natural insect repellent (use undiluted) for ants, cockroaches.
7) for mopping floors (1 part enzyme to 20 parts water)
8) as fertilizer for plants (use 1 part enzyme to 20 parts water, or use the leftover mop water)
9) as a skincare product, e.g. facial cleanser or toner (1 part enzyme to 2 parts water)
10) wash cars – cars will look as if they have just been polished! (1 part enzyme to 20 parts water


SPECIAL NOTE: After making the orange version of this, I think I would prefer to use limes next time. I like the smell of the oranges, but a more lemon- lime scent would be awesome!

Tuesday, February 12, 2013

...I chose cloth diapers. (Part 1: Why I made the switch.)

I had considered cloth diapering while I was still pregnant, but after hearing horror stories from family members I opted out of it. I did tell my sister that if anyone got me cloth diapers I'd use them, but I didn't put them on my registry and I didn't talk about them much so nobody did. I was pretty obsessive about what brands and products I was going to "allow" to touch my baby, so it might be a good thing that I didn't add CD's to the registry at that time. Between my specifics on breastfeeding equipment and supplies, colors, chemicals, ergo wraps, babyfood making machines, etc...we might not have gotten anything if I had been any more picky.

For diapers, we (I) decided on Pampers. The hospital provided a few packages of Swaddlers to take home anyways, so we stuck with the brand. It wasn't until my daughter was about 4 months old that I had an issue with disposables. One night I noticed a slight rash on her bottom. I slathered it with Desitin and decided to just keep an eye on it. By morning, despite having a healthy coat of Desitin after every changing, the rash was no longer just red skin but had started to get little bumps. I did some research and found two possible solutions: switch the diaper, or switch the cream.

I shopped around and tried samples of talc powders, beeswax, Vaseline, and A&D, but none of them kept my baby's little tush from breaking out. Then I tried Aquaphor, which helped with the healing better than any of the others, but it never really prevented the rash from coming back. So, I collected diapers from some friends who were willing to let me try their brands (so I didn't have to buy entire packs). I tried Huggies, Luvs, Kroger brand, Parent's Choice, Dollar General brand, Target brand, and Walgreen's brand. Some were better at containing the poo explosions than others, some held more liquid than others, but they all resulted in the same rash.

When I started looking more into  the cause behind diaper rash, I read that all disposables contain a chemical called polyacrylate (sodium polyacrylate). This is the same powder that hospitals and supermarkets use to sprinkle onto spills that quickly absorbs liquids and turns into a jelly. (That's why sposies give baby a "squishy butt".) There is also a new product out called "Squishy Baff" that comes in a little packet that you pour into your child's bathwater (a friend tried this stuff, it is actually pretty cool)....and the entire product is made of the same polyacrylate that is in disposable diapers. It's labelled as non-toxic, but obviously they don't want anyone to eat any of it. It wasn't enough for me just to know polyacrylate was there- I needed to see it. I came up with a pretty neat science experiment that I'll be keeping for when the babe is old enough to participate, and when that time comes we're going to be investigating how awesome that stuff is....just not on baby's butt.

When it comes to polyacrylate in diapers, most babies have little to no reaction, and when they do the diaper creams are generally pretty good at keeping a barrier between skin and chemical. That just wasn't the case with my girl. I needed to find a way to avoid polyacrylate. The only way to do that was to use cloth. I did a lot of research to find the most cost effective, convenient way to go about the transition (and I'll share all of that information in another post), and we've been in cloth ever since.

I won't lie, sometimes when I'm bagging up a particularly stinky diaper in the WalMart bathroom, I do wish I could just throw it away. But that's when I remember the fundamental benefits of cloth diapering:
  • My baby has a cute fluffy butt
  • My baby no longer suffers from open sores on her bum
  • My budget doesn't have to include $100 worth of diapers every month
  • I saved almost $700 in the last year by cloth diapering
  • I'm going to resell them when we're done, and get my money back
  • I don't have to contribute any more diapers to solid waste
...and then having a ziplock freezer bag of diaper in my purse for another 20 minutes doesn't seem like such a big deal.